Sign in

Get started with a realtime AI chat using Liveblocks, AI Elements, and Next.js

Liveblocks Feeds persist chat messages and stream updates to everyone connected to a room. Follow these steps to build a realtime AI chat in a Next.js /app directory application, using AI Elements for the interface and the AI SDK to generate responses.

Live example

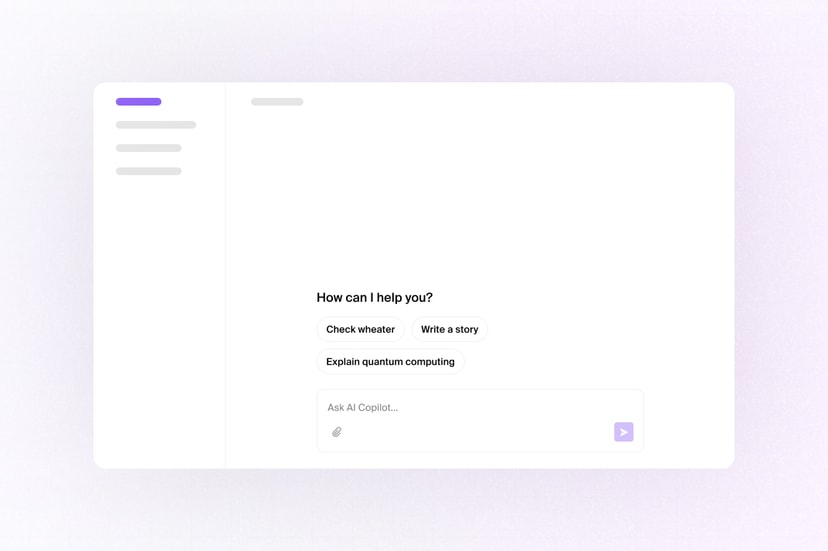
See the finished result in the Realtime AI Elements Chats example.

Quickstart

  1. Install Liveblocks and the AI SDK

    Every Liveblocks package should use the same version.

    Terminal
    npm install @liveblocks/client @liveblocks/node @liveblocks/react ai
  2. Install AI Elements

    Install the AI Elements components used in this guide. The CLI adds the component source and any required shadcn/ui dependencies to your app. AI Elements requires React 19 and Tailwind CSS 4.

    Terminal
    npx ai-elements@latest add conversationnpx ai-elements@latest add messagenpx ai-elements@latest add prompt-input

    MessageResponse uses Streamdown to render Markdown. Add its source files to your Tailwind CSS configuration.

    app/globals.css
    @import "tailwindcss";
    /* AI Elements message Markdown */@source "../node_modules/streamdown/dist/*.js";
  3. Add your API keys

    Add your Liveblocks secret key from the dashboard, then add an AI Gateway key for model access. Keep both keys on the server.

    .env.local
    LIVEBLOCKS_SECRET_KEY=""AI_GATEWAY_API_KEY="your-ai-gateway-key"
  4. Initialize the liveblocks.config.ts file

    Create a config file that will hold the Liveblocks types for your app.

    Terminal
    npx create-liveblocks-app@latest --init --framework react
  5. Define the feed message shape

    In liveblocks.config.ts, define the JSON data stored in each feed message. The streaming property lets every connected client show when an assistant response is still being generated.

    liveblocks.config.ts
    declare global {  interface Liveblocks {    FeedMessageData: {      role: "user" | "assistant";      content: string;      streaming?: boolean;    };
    FeedMetadata: {}; }}
    export {};
  6. Stream AI responses into the feed

    Create an API route that generates a response with the AI SDK. The route creates one assistant message with createFeedMessage, then writes each batch of generated text into it with updateFeedMessage. Because the response is stored in a feed, every connected user sees it stream in through Liveblocks—no separate client-side AI stream is needed.

    app/api/ai-reply/route.ts
    import { Liveblocks } from "@liveblocks/node";import { streamText } from "ai";import type { NextRequest } from "next/server";
    type ChatMessage = { role: "user" | "assistant"; content: string;};
    export async function POST(request: NextRequest) { const liveblocks = new Liveblocks({ secret: process.env.LIVEBLOCKS_SECRET_KEY!, });
    const { roomId, feedId, messages }: { roomId: string; feedId: string; messages: ChatMessage[]; } = await request.json();
    // Create an empty assistant message const assistantMessage = await liveblocks.createFeedMessage({ roomId, feedId, data: { role: "assistant", content: "", streaming: true }, });
    let content = ""; const updateAssistantMessage = (streaming: boolean) => liveblocks.updateFeedMessage({ roomId, feedId, messageId: assistantMessage.id, // updateFeedMessage replaces data, so always send every property data: { role: "assistant", content, streaming }, });
    try { const result = streamText({ model: "openai/gpt-5.4-mini", system: "You are a helpful assistant.", messages, });
    let lastUpdate = 0;
    // Persist the streamed response in the same feed message for await (const text of result.textStream) { content += text;
    if (Date.now() - lastUpdate >= 100) { await updateAssistantMessage(true); lastUpdate = Date.now(); } }
    await updateAssistantMessage(false); } catch (error) { const reason = error instanceof Error ? error.message : "Unknown error"; content ||= `Sorry, something went wrong.\n\n\`${reason}\``; await updateAssistantMessage(false).catch(() => {}); return new Response(reason, { status: 500 }); }
    return Response.json({ ok: true });}

    In production, validate the user and their access to roomId before writing messages with a secret key.

  7. Build the chat with AI Elements

    Use useFeedMessages to render the shared message history. When a user submits the AI Elements PromptInput, create the feed if needed, append their message with useCreateFeedMessage, and call the server route.

    app/Chat.tsx
    "use client";
    import { useRef, useState } from "react";import { useCreateFeed, useCreateFeedMessage, useFeedMessages, useRoom,} from "@liveblocks/react/suspense";import { Conversation, ConversationContent, ConversationScrollButton,} from "@/components/ai-elements/conversation";import { Message, MessageContent, MessageResponse,} from "@/components/ai-elements/message";import { PromptInput, PromptInputBody, PromptInputFooter, PromptInputSubmit, PromptInputTextarea, type PromptInputMessage,} from "@/components/ai-elements/prompt-input";
    const FEED_ID = "ai-chat";
    export function Chat() { const { messages } = useFeedMessages(FEED_ID); const createFeed = useCreateFeed(); const createFeedMessage = useCreateFeedMessage(); const room = useRoom(); const ensuredFeed = useRef(messages.length > 0); const [isGenerating, setIsGenerating] = useState(false);
    async function send(text: string) { const content = text.trim(); if (!content || isGenerating) { return; }
    setIsGenerating(true);
    try { // A feed must exist before adding its first message if (!ensuredFeed.current) { ensuredFeed.current = true; createFeed(FEED_ID, { metadata: {} }).catch(() => { // Another user may have created the feed first }); }
    const userMessage = { role: "user" as const, content }; createFeedMessage(FEED_ID, userMessage);
    await fetch("/api/ai-reply", { method: "POST", headers: { "Content-Type": "application/json" }, body: JSON.stringify({ roomId: room.id, feedId: FEED_ID, messages: [ ...messages.map(({ data }) => ({ role: data.role, content: data.content, })), userMessage, ], }), }); } finally { setIsGenerating(false); } }
    return ( <div className="mx-auto flex h-[600px] max-w-3xl flex-col"> <Conversation className="flex-1"> <ConversationContent> {messages.map(({ id, data }) => ( <Message key={id} from={data.role}> <MessageContent> <MessageResponse>{data.content}</MessageResponse> {data.streaming && !data.content ? ( <span>Thinking…</span> ) : null} </MessageContent> </Message> ))} </ConversationContent> <ConversationScrollButton /> </Conversation>
    <PromptInput onSubmit={(message: PromptInputMessage) => send(message.text)} > <PromptInputBody> <PromptInputTextarea placeholder="Ask anything…" /> </PromptInputBody> <PromptInputFooter className="justify-end"> <PromptInputSubmit disabled={isGenerating} status={isGenerating ? "submitted" : "ready"} /> </PromptInputFooter> </PromptInput> </div> );}
  8. Create a Liveblocks room

    Liveblocks rooms are separate collaborative spaces. Users connected to the same room share the same feeds and messages. Set up a LiveblocksProvider, join a room with RoomProvider, and use ClientSideSuspense while the feed loads.

    app/Room.tsx
    "use client";
    import { ReactNode } from "react";import { ClientSideSuspense, LiveblocksProvider, RoomProvider,} from "@liveblocks/react/suspense";
    export function Room({ children }: { children: ReactNode }) { return ( <LiveblocksProvider publicApiKey=""> <RoomProvider id="my-ai-chat"> <ClientSideSuspense fallback={<div>Loading…</div>}> {children} </ClientSideSuspense> </RoomProvider> </LiveblocksProvider> );}
  9. Add the room and chat to your page

    Render the chat inside the room so it can use the Feeds hooks.

    app/page.tsx
    import { Chat } from "./Chat";import { Room } from "./Room";
    export default function Page() { return ( <Room> <Chat /> </Room> );}
  10. Next: authenticate your users

    Your realtime AI chat is now working. Before going to production, authenticate your users and give them explicit access to the rooms and feeds they can use.

    Set up authentication

What to read next

You’ve built a realtime AI chat where Liveblocks persists and synchronizes the conversation, the AI SDK generates responses, and AI Elements renders the interface.

Example using AI Elements